Showing posts sorted by relevance for query clutter. Sort by date Show all posts

Friday, February 20, 2015

Clearing Cabinet Clutter & Clutter Curbing Cat


While I love the energy and immediate results of a quick clutter clearing session, sometimes health, energy or time only allow for short little bits of clutter busting. Based on the photo dates, this cabinet took me at least from January 12 to 24 to clear of clutter.

The "before" photo is on the left and the "after" photo is on the right. I believe, based on the thick sweaters to the left and black socks scattered here and there in the "before" photo, that I started before January 12 because when I started on this cabinet it was crammed full and there was no room for even the socks.

I decided to put the socks in there to make them easier to reach once a little space was cleared. In the "after" photo you can see that all the socks now fit on one shelf. I've since moved my white and fleece socks to the shelf below and now all of the socks I regularly wear are easy to reach. In addition, the cabinet now holds my warmest winter sweaters, alternate winter bedding, extra pillows, a treasured afghan made by a precious friend and travel supplies.

If you've been following my blog you know organizing is a love of mine and clutter clearing an ongoing goal. My health has not been great lately but I still aim to clear a little clutter every day, even if it's just one item. Knowing that I haven't missed a day in over a year makes me want to keep the streak going. Sometimes it's random items and sometimes it'll be focused on one area (like the cabinet above). I currently have four of these cabinets in our master bedroom and I'd like to eliminate them and eventually consolidate things into our existing closets and other more attractive furniture. The other three cabinets have clothing. One is already clutter busted, so keep an eye out for the next clutter busted cabinet post soon.
My cute little cat, Baby, loves to watch me clear clutter. And when I find an item she might enjoy playing with we take a little break and have fun. She absolutely loved this gold tassel and when she flipped it over her head and it landed on her ear I couldn't resist taking her photo. She's the best clutter clearing helper. When I'm not sure whether to keep something I let her smell it and usually while she's investigating I have my answer. She gets rewarded with petting and everyone's happy.

Do you have any clutter busting tips? I'd love to hear them! May God bless you and yours!

Related posts:
Quick desk clutter clearing: http://lovejoyandpeas.blogspot.com/2013/02/16-minute-desk-decluttering-project.html
Fast microwave area clearing: http://lovejoyandpeas.blogspot.com/2013/03/8-minute-microwave-and-cut-flower.html
14 minute kitchen clutter bust: http://lovejoyandpeas.blogspot.com/2013/03/14-minute-kitchen-counter-clutter.html
3 shelves organized in 9 minutes: http://lovejoyandpeas.blogspot.com/2013/08/how-i-decluttered-3-shelves-in-9.html

Tuesday, February 28, 2017

Great Clutter Purge of 2017: January & February Results

Tiny Tidy Flowers: Copyright © Phyllis Wheeler, 2017
Happy tidy Tuesday! As I mentioned in last week's post, I'm working on my Great Clutter Purge of 2017, inspired by ClutterBug Cas's similarly named endeavor. So far, my results sound great, especially since I didn't start until around January 20th but I'll tell you the rest of the story after sharing the numbers.

January - 448 pieces of clutter released

February - 1,578 pieces of clutter released

Total so far for my Great Clutter Purge of 2017 - 2026 pieces of clutter released

The actual numbers seem impressive, but when I look around my home... there's hardly a visible dent in the clutter situation. My progress has been slow due to health issues. When I don't feel well I tend to work on paper clutter (of which I have an unseemly amount). Busting paper clutter makes for nice numbers but doesn't actually free up much space. There are still huge piles to go.

On the plus side, if I hadn't kept track of the numbers I might be feeling like I hadn't made any progress at all. And it wasn't all just paper. I think I made two charitable donation trips (bags and bags of household items, books and clothes) and did clear out a substantial pile to the right of my desk. I really enjoy seeing that empty space now. It is a reminder that, God willing, when I get to feeling better, I can make more visible progress.

Want to join me in the Great Clutter Purge of 2017? Feel free to share your successes, challenges and/or ideas in the comments. I'd love to hear from you!

Thank you for visiting! May God bless you!

Related posts:
ClutterBug's Great Purge: http://lovejoyandpeas.blogspot.com/2017/02/cas-clutterbugs-great-purge-of-2017.html
Organized Linen Closet: http://lovejoyandpeas.blogspot.com/2015/07/from-disaster-to-delight-organized.html
Tidy Dresser Top: http://lovejoyandpeas.blogspot.com/2016/01/clutter-clean-in-2016-first-project-top.html

Thursday, January 21, 2016

Mystery Corner in Master Bedroom: Clutter Clean in 2016

Rearranged long dresser top: Copyright © Phyllis Wheeler, 2016
Today's main clutter busting project was the mystery corner (below) but I also took a few more items away and rearranged the dresser top featured in yesterday's post. I originally left the middle of the dresser open for folding laundry but decided that I'm fine with continuing to fold it on the bed. You can see the individual items more easily this way but the front 2/3 of the dresser is clear so it's still nice. I will probably continue rearranging until I think it's just right.
Mystery corner clutter: Copyright © Phyllis Wheeler, 2016
This mystery corner used to hold my hamper but I moved it closer to where I use it (you can see part of it in the next photo). This corner is a clutter magnet because there's no purpose to it at the moment, other than holding the floor lamp and a cat bed (the basket). We have no overhead lighting in the bedroom so the lamp is needed. 
Full view mystery corner "before": Copyright © Phyllis Wheeler, 2016
Here's a better view of the area I worked on today. The pile of black clothes isn't clutter; it's just laundry. So the first thing I did was to put the load of black laundry in the washer. I had put the empty box out to see if Baby cat liked it more than her basket. She did not, so it's going to recycling.

Two of the containers were full of weird stuff (from old love notes to painting supplies to an organic buckwheat pillow). There was even a box full of notes from books I read long ago (the box fit inside another box - boxes within boxes!). So I put away the keepers that belonged elsewhere (none of it belonged in the corner) and added the rest to the recycling or donation bags (recycling is in the kitchen and donation is in the office).

The white basket is currently being used for new items that need to be washed before used. I like to save the environment and money by doing fuller loads of wash so I wait until I have enough of the new item(s)' color (new things often bleed when washed for the first time) to make it worthwhile. I relocated that basket to the other side of the hamper so it's not one of the first things you see when walking in the bedroom.
Full view mystery corner "after": Copyright © Phyllis Wheeler, 2016
This is the finished view. Much neater and less cluttery. I'd like to make use of that corner but I'm not sure if I want a little reading nook or a makeup vanity so until I decide, it's fine as a cat bed/lamp spot. What would you do with this corner if it were your room?

Lessons learned/Tips:
  • Shutting the lid on things makes them look neater (see the hamper open vs closed in above photos)
  • Having the floor clear makes the whole area look better
  • Less is more when it comes to the floor
Thank you for visiting! May God bless you and all you do!

Related posts:
Dresser clutter: http://lovejoyandpeas.blogspot.com/2016/01/clutter-clean-in-2016-first-project-top.html
Old hamper arrangement: http://lovejoyandpeas.blogspot.com/2014/08/my-simplifying-home-journey-week-7-day-7.html
Cabinet clutter: http://lovejoyandpeas.blogspot.com/2015/02/clearing-cabinet-clutter-clutter.html
Closet clutter: http://lovejoyandpeas.blogspot.com/2015/07/from-disaster-to-delight-organized.html

Wednesday, January 20, 2016

Clutter Clean in 2016! First Project: Top of Long Dresser

"After" dresser top corner: Copyright © Phyllis Wheeler, 2016
Happiest New Year wishes to you! May God bless you and all you set your mind, heart and hands to do this year!

I've decided to make this the year of clearing the clutter for good. Not just clutter busting the excess in our home but actually changing acquisition habits so that I only bring in things that we need or love. Because of ongoing health challenges, the physical removal of clutter may be slow going but as long as I'm making regular progress, I'll count it a success.

My super kind hearted Facebook friends suggested that I journal this process and share tips and this article is in their honor. Thank you for your support, encouragement and prayers!
"Before" long dresser top: Copyright © Phyllis Wheeler, 2016
I started on this dresser yesterday but didn't take a photo until today. It looks cluttered in the "before" photo above but yesterday it was even worse. Yesterday I just took things that belonged elsewhere and put them where they belonged. Today I cleared everything off the top of the dresser (using long shallow plastic baskets I have on hand) and moved them to the living room for sorting. I determined to only keep that which I need or love so a lot went into charity bags.

Baby cat explores cleared dresser: Copyright © Phyllis Wheeler, 2016
My little cat, Baby, immediately jumped on the newly cleared space. She loves to explore and I love her. I will likely do a backdated post, but, sadly, Moose the cat passed away after Christmas. Moose was about 20 years old and was greatly loved. Now Baby is our sole feline companion. God willing, Baby will be 16 this spring. But back to the clutter busting.
"After" dresser top: Copyright © Phyllis Wheeler, 2016
Here's the "after" photo. I like it so much better than the before. While there's still plenty of clutter in the room, the whole place feels lighter and nicer. I will probably reconfigure the top in the future but for now it's my "Clutter Clean in 2016" inspiration point. My goal for this week is to keep it clear and take time to enjoy the newly organized space.

If you have a completed clutter clearing or organizing project with before and after photos and want to be considered as a feature for my "Clutter Clean in 2016" series, please let me know! There are so many of us looking to simplify, streamline and create space for what truly matters. You'll be an inspiration. You can leave a comment below or email me at lovejoypeas@gmail.com. If there's a lot of interest I'll look into creating a Flickr pool for the photos.

Thank you for visiting! May God bless you!

Related posts:
Quick desk clearing: http://lovejoyandpeas.blogspot.com/2013/02/16-minute-desk-decluttering-project.html
Disaster to delight: http://lovejoyandpeas.blogspot.com/2015/07/from-disaster-to-delight-organized.html
8 minute clutter bust: http://lovejoyandpeas.blogspot.com/2013/03/8-minute-microwave-and-cut-flower.html
3 shelves in 9 minutes: http://lovejoyandpeas.blogspot.com/2013/08/how-i-decluttered-3-shelves-in-9.html
My simplifying home journey: http://lovejoyandpeas.blogspot.com/2014/08/my-simplifying-home-journey-week-8-day.html

Monday, August 4, 2014

My Simplifying Home 8 Week Journey: Week 5, Day 7

"After" organizing: Copyright © Phyllis Wheeler, 2014
This week did not go according to plan. But God is good! And He saw me through a trying week. Instead of going by my prioritized list, I had to take care of some health challenges and a cat challenge. Or should I say... a cat accident. Moose the cat knocked down an air purifying Chinese evergreen houseplant and a pile of pillows off of the taller dresser. Why did she think she'd fit up there with the plant and all those pillows? Only Moose knows.
"Before" organizing: Copyright © Phyllis Wheeler, 2014
On the day Moose knocked the plant and other stuff down I was able to scoop some of the dirt up and stick the plant back in the pot (it had fallen completely out) but (because of health challenges) it was another two days before I was able to deal with the area. I hate to let dirt settle but sometimes there's no choice.

Normally, I choose a smaller, more manageable area for these posts but dirt from the houseplant fell far and wide so it ended up really being multiple projects:
  • Clean/organize/clutter clearing of tallest dresser
  • Clean/organize/clutter clearing of medium dresser
  • Clean/organize/clutter clearing of hubby's nightstand
  • Clean/organize/clutter clearing of chair's side table
  • Clean/organize/clutter clearing of floor 
  • Clean/organize/clutter clearing between dressers
  • Clean/organize/clutter clearing between nightstand and dresser
  • Clean, move and vacuum under chair
  • Repot houseplant
Because of the bits of houseplant dirt scattered all over the place, I tackled the first eight projects listed above as if they were one. I cleared the whole area then cleaned the dirty non furniture stuff. I cleaned the various pieces of furniture. I used a dustpan and brush to get up as much of the loose dirt as possible and then vacuumed thoroughly. Before I put anything back I determined whether we really love, need or use it so the result is a much nicer, clutter-free area. Even if it wasn't originally on my list of things to do this week.
"After" organizing 2: Copyright © Phyllis Wheeler, 2014
Above is another "after" photo of the newly organized corner of our bedroom from another angle. I should probably move those dahlias (in the little clear glass jar) before Moose has another accident.

Just in case you're wondering... in the first two photos you can see the edge of my chair. It's positioned so I can watch the hummingbirds at their favorite feeder. Also, to me, the lion and the lamb are symbolic of heaven, peace and God's love so I like to have them kind of hugging each other.

Thank you for joining me and thank you to Trina of Beginner Beans for making her Simplifying Home challenge a free resource. May God bless you and Trina too!

How do you deal with spills and accidents? Do you have a great clutter clearing story or organizing tip to share? I'd love to hear it!

Related posts:
Week 1, day 1: http://lovejoyandpeas.blogspot.com/2014/07/my-simplifying-home-8-week-journey-week.html
Week 2, day 7: http://lovejoyandpeas.blogspot.com/2014/07/my-simplifying-home-8-week-journey-week_14.html
Week 3, day 3: http://lovejoyandpeas.blogspot.com/2014/07/my-simplifying-home-8-week-journey-week_17.html

Week 3, day 7: http://lovejoyandpeas.blogspot.com/2014/07/my-simplifying-home-8-week-journey-week_21.html   

Week 4, day 3: http://lovejoyandpeas.blogspot.com/2014/07/my-simplifying-home-8-week-journey-week_24.html  

Week 4, day 7: http://lovejoyandpeas.blogspot.com/2014/07/my-simplifying-home-8-week-journey-week_28.html

Tuesday, March 21, 2017

Quick and Easy Tea Nook Clutter Busting

Tidied tea nook: Copyright © Phyllis Wheeler, 2017
Happy tidy Tuesday and Spring! The Great Clutter Purge of 2017 continues with a quick flat surface area / kitchen counter clutter busting project.

We have tea almost every day but this little tea nook to the left of our range is a clutter magnet. The above photo is an "after" clutter busting image. It includes one thing that wasn't in the "before" photo below. Can you spot it?
"Before" cluttered tea nook: Copyright © Phyllis Wheeler, 2017
This "before" photo shows a much messier tea nook. Most of this stuff isn't clutter in the sense that we don't use it but it is clutter in the sense that it doesn't belong there.
"After" uncluttered tea nook: Copyright © Phyllis Wheeler, 2017
So I removed everything from the area, cleaned the empty space, put the out of place things where they belonged and then returned the things that did belong.

Then I noticed the cup hook with nothing on it. I searched for and found the missing oven mitt and hung it back up (see the topmost image - that was the extra item not present in the "before" photo).  I like the tidied tea nook much better this way.

Thank you for visiting! May God bless you!

Related posts:
Quick Kitchen Counter Organizing: http://lovejoyandpeas.blogspot.com/2013/03/14-minute-kitchen-counter-clutter.html
Microwave Area Clutter Busting: http://lovejoyandpeas.blogspot.com/2013/03/8-minute-microwave-and-cut-flower.html
Organized Utensil Drawer: http://lovejoyandpeas.blogspot.com/2014/07/my-simplifying-home-8-week-journey-week_21.html

Tuesday, July 28, 2015

From Disaster to Delight: An Organized Linen / Cosmetics / Toiletries / Storage Closet

My big organizing achievement for July was my linen closet, which also serves as a cosmetics/toiletries and general storage closet. The "before" clutter clearing & organizing photo is on the left and the "after" is on the right. Big difference!

Someone asked for details on this clutter busting project so here they are. The basic "how to" was the same as most of my organizing and clutter busting projects:
  1. Remove everything, 
  2. Clean the empty space, 
  3. Get rid of everything I don't need/use/love, 
  4. Organize what's left. 
For the purging I donate everything useable (either to charity or friends), recycle everything left that can be recycled and trash the rest (very little has to be trashed, thankfully).
  • Extra toilet paper is stored in the small handled basket on the top shelf.
  • Hair accessories are in the pink photo storage box on the top shelf (the box below it is empty for now but it will probably gain items from under the sink vanity once I get to that).
  • The baskets hold one type of linen or cosmetics/toiletry each. There's a basket for pillow cases, hand towels, face cloths, hair products, face products, body products, etc. Blankets are stored in an extra drawer in the bedroom but since there's space on the top shelf I might eventually move them there. 
  • Within the linen storage baskets things are folded uninformly by what makes sense for the amount of that item that we have and the depth/width of the basket, mostly with rounded edges facing upward and the neatest part facing forward.
  • Towels and the extra bath mat are folded so the rounded edges face outward.
  • They don't show in the photo but we store our space heaters and some cleaning projects on the bottom shelf.
Last year I bought baskets and kind of organized things but I didn't purge enough to make it truly organized. It's hard to tell from the photos but there's a big space above the door jam and there's a bar to hang clothing up by the ceiling. I left the two cedar hangers on the bar and you can see the very ends of them in the "before" photo (above) but the rest of that space is empty right now (though eventually I might hang extra table cloths from the bar as our clothing is too long for the space).

Clutter clearing was definitely beneficial here as retrieving things is easier and I don't have to worry about things falling on my head when I grab something from the top shelf anymore (a definite bonus). I think the biggest difference from the first go at organizing this closet and this time was having read Marie Kondo's The Life Changing Magic of Tidying Up. I haven't implemented her process yet but it made it a lot easier to release the things that don't "spark joy."

I love to organize but have a host of health challenges and little energy lately so this project took me from July 6 to July 27, even with my kind husband's help. The key was to do a small, managable section at a time (like one basket). 

Thank you for visiting! May God bless you!

Do you have any storage organizing tips? I'd love to hear them! 

Related posts:
Storage cabinet clutter clearing: http://lovejoyandpeas.blogspot.com/2015/02/clearing-cabinet-clutter-clutter.html
8 minute microwave area organizing: http://lovejoyandpeas.blogspot.com/2013/03/8-minute-microwave-and-cut-flower.html
14 minute kitchen counter clearing: http://lovejoyandpeas.blogspot.com/2013/03/14-minute-kitchen-counter-clutter.html

Tuesday, March 7, 2017

Quick Refrigerator Front Clutter Busting for Tidy Tuesday

Photo by me; Magnet by https://www.opendoorsusa.org/
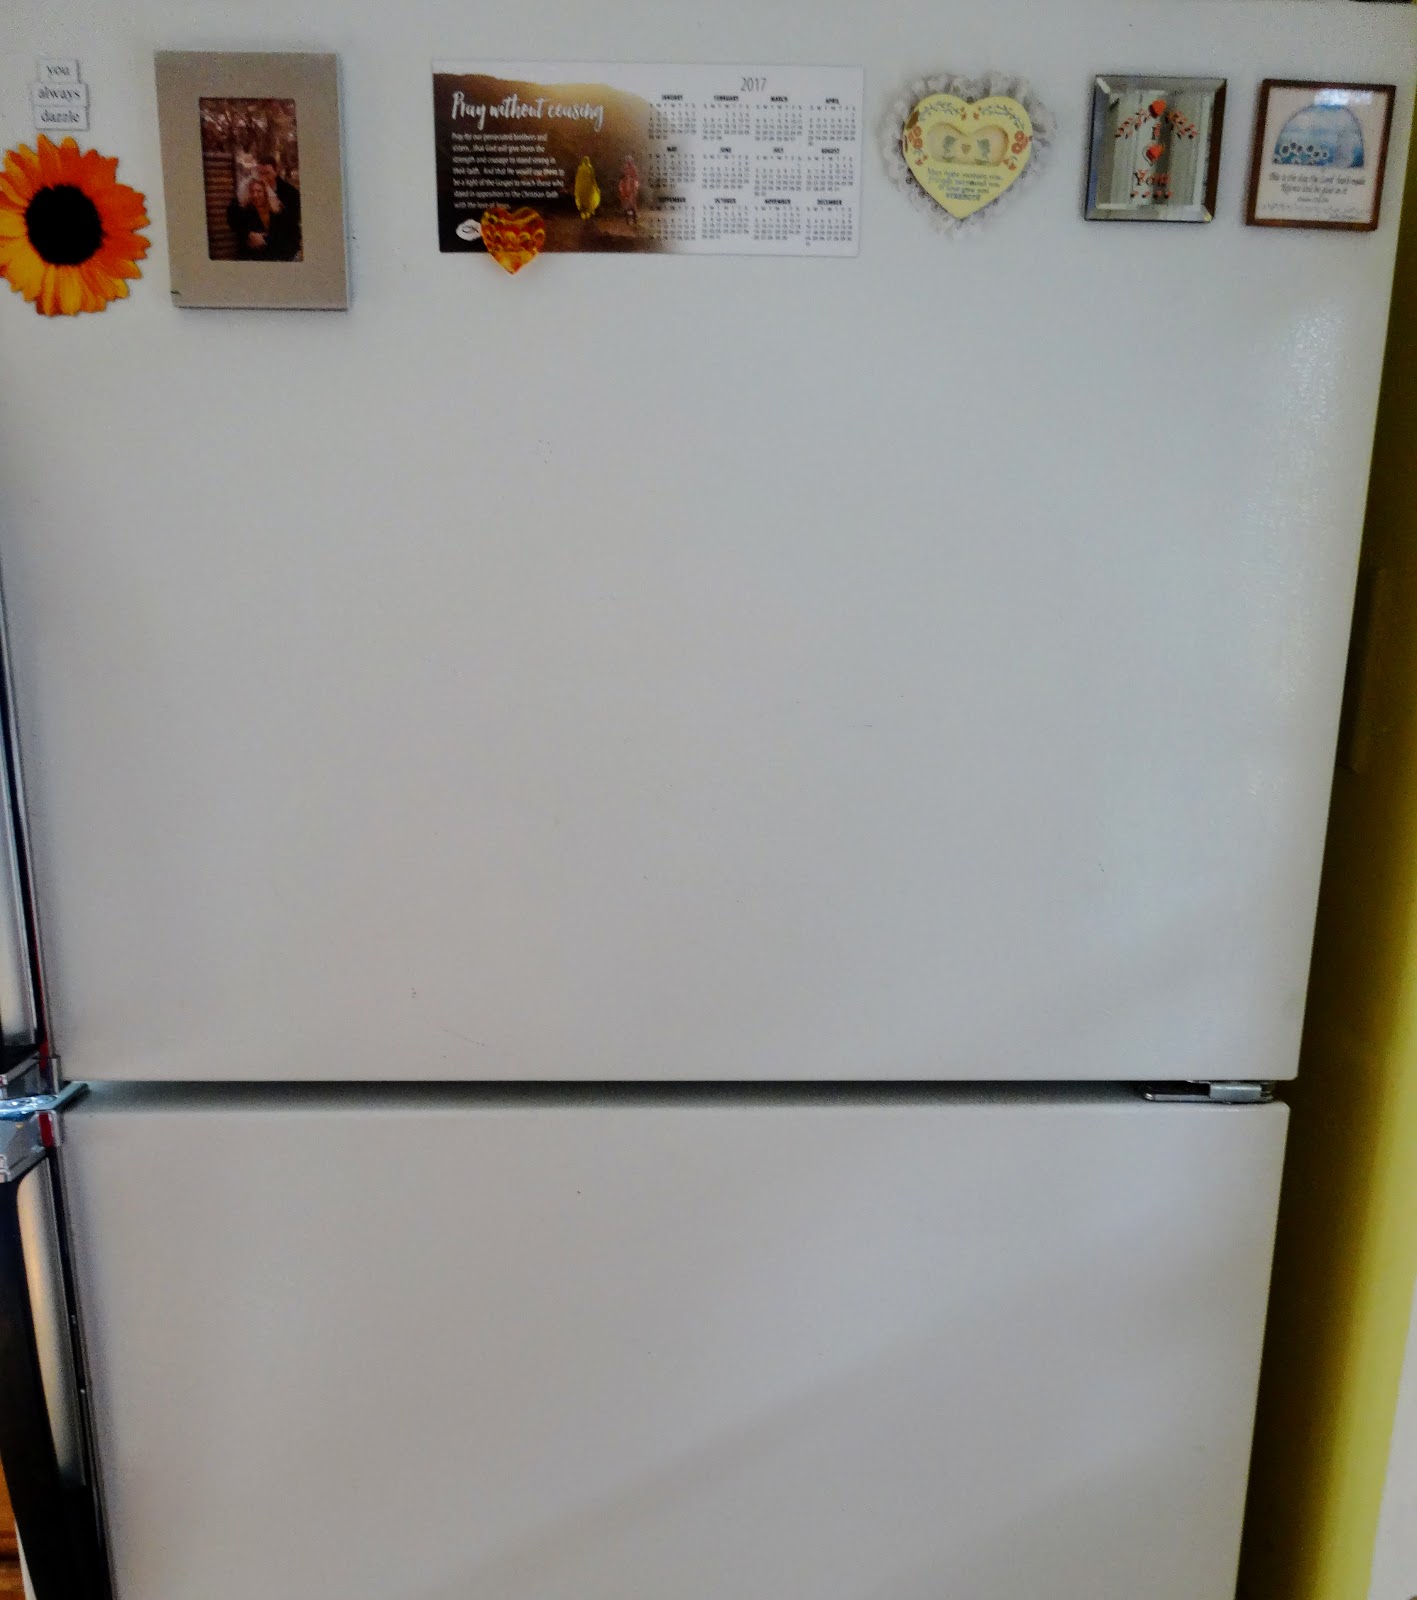
Happy tidy Tuesday! My Great Clutter Purge of 2017 continues. Until this week I'd been operating on a spontaneous method but yesterday I started a clockwise organization of the kitchen surfaces. I feel like these surfaces are clutter magnets so my current plan is to go from room to room and deal with all the visible surfaces. Today I tidied the front of my refrigerator.
"Before" clutter busting photo of refrigerator
I liked everything on the freezer section but it was just too much. The stuff on the refrigerator section was just to remind me of things to do and could definitely go somewhere else.
Totally clear refrigerator front
So I removed everything and gave the front of the refrigerator a quick cleaning. Truly, I don't need anything on it at all. If I were a minimalist, I'd probably leave it like this.
"After" clutter busting photo of refrigerator
But I decided it was reasonable and not untidy to keep one row of things that inspire me.
Love corner: Copyright © Phyllis Wheeler, 2017
This is my favorite photo of my husband and I just before getting married, along with a little poem and a magnet of a cheerful sunflower. I call it my refrigerator's love corner.
Psalm 118:24 art by Linda Grayson; Photo by me
This is a Bible verse I like to recite every morning. I don't remember who gave it to me but I've had it for at least 10 years and it makes me smile. Thank you, mystery family member or friend!
The Sandman loves organizing: Copyright © Phyllis Wheeler, 2017
The whole time I worked on the refrigerator I had to be careful not to step on my most curious cat, the Sandman. Technically he's still a kitten but he weighs almost 14 pounds. He and his sister, Braveheart, will be one year old on March 27th. I'm not sure how we'll celebrate yet but would love to hear your suggestions.

Thank you for visiting! May God bless you!

Related posts:
Linen closet organization: http://lovejoyandpeas.blogspot.com/2015/07/from-disaster-to-delight-organized.html
Mystery corner clutter busting: http://lovejoyandpeas.blogspot.com/2016/01/mystery-corner-in-master-bedroom.html
8 minute microwave area clutter bust: http://lovejoyandpeas.blogspot.com/2013/03/8-minute-microwave-and-cut-flower.html

Note: Not a sponsored/paid post. All opinions are my own 

Tuesday, March 14, 2017

Tidy Tuesday Tip: Consolidate and Containerize

Sunset yellow roses with red tips: Copyright © Phyllis Wheeler, 2017
Happy tidy Tuesday! I think I took the rose photo above on March 9th and in the photos below you can see that they've held up pretty well. But that has nothing to do with Tidy Tuesday. The main point of this post is that if you don't have time to do a real clutter busting session, consolidating and containerizing works really well.
Messy dining room table "before": Copyright © Phyllis Wheeler, 2017
On weekends that I'm too busy or health challenged, things pile up on our table. Yesterday, when I was walking by after getting the mail, the gloves were in a stack on top of the scarf which was on top of the pile of hats. It didn't look that bad because it was all stacked together (consolidated). But I thought it was a great opportunity to demonstrate consolidation and containerization. So I spread everything out and added the mail that I hadn't already recycled (I like to recycle what we don't need as soon as I bring it in).

Yes, I wore all that stuff since last Friday. No, I am not a minimalist.

You can barely see one of them but there are three jackets hanging off chairs around the table. I prefer to put my jacket away right after coming inside but if the kittens are eager to play they'll jump in the closet and I have a hard time getting them out. So I just wait until they're asleep.
Containerized & consolidated table "after": Copyright © Phyllis Wheeler, 2017
Everything that was in the first photo ("before") is still represented here in this first "after" photo! Although the bag got cut off so you can just see just the edge of it on the left. All I did to get to this point was to stack all 3 jackets on one chair (consolidate) and put everything that was spread all over the table and didn't belong there in the brown paper bag (containerize). Then I put the brown paper bag on one of the chairs. Instant improvement!

Fastest tidying tip - just dump everything in a container and get it out of the way. Now, don't get me wrong, that's not true organizing. But if you just want things to look better fast, it works.
True "after" with everything put away: Copyright © Phyllis Wheeler, 2017
I then put the jackets and everything that was in the brown paper bag away. This is what I prefer my table to look like. Streamlined with a few accents on the far end. I could do without the accents but there's space and the plants like it there. The table is in a central part of our home so it's a nice place to see flowers regularly.

Although I didn't recycle anything except the paper bag in this post, the Great Clutter Purge of 2017 continues. I have been releasing clutter. It just hasn't been very photogenic. Hopefully next week will lead to some great photo ops. Only God knows!

Hope this quick tip was interesting or useful for you! If so, I'd love to hear about it.

Thank you for visiting! May God bless you!

Related posts:
Refrigerator front organizing: http://lovejoyandpeas.blogspot.com/2017/03/quick-refrigerator-front-clutter.html
Great Clutter Purge 2017 Intro: http://lovejoyandpeas.blogspot.com/2017/02/great-clutter-purge-of-2017-january.html
Linen closet organizing: http://lovejoyandpeas.blogspot.com/2015/07/from-disaster-to-delight-organized.html

Tuesday, March 5, 2013

8 Minute Microwave and Cut Flower Decluttering Project

This project took 7 minutes and 39 seconds. It included removing everything but the microwave, cutting boards (stored behind the microwave) and knife block; cleaning and dusting the area and contents; purging the clutter; categorizing the items being returned to the area (my sunflower trivets and my husband's magazines and what I presume is the last cookbook he used to make dinner last night); putting the things that belonged elsewhere away (if they belonged somewhere else in the kitchen) or in a basket for distribution later; culling the dead flowers from the arrangement; trimming the stems of the keepers; rinsing the old vase out and putting the remaining flowers in a new vase.

The first two photos are the "before" images. I included both because in the first one it looks more cluttered but you can only see the whole area in the second one.

This last photo is the "after" picture. So much nicer! I'd have moved hubby's cookbook and magazines (he has a bookshelf for his cookbooks and a storage area for his magazines) but figured he had them in the kitchen for a reason so I'd let him deal with that when/if he wants to do so. I'm so thankful that he cooks I can certainly live with a bit of clutter in the kitchen.

I hope this inspired you in some way! If so, I'd love to hear about it. You're also welcome to join my clutter busting Facebook community. Whatever your goals, may God bless you and keep you!

Full links and related posts: 
14 minute kitchen counter clutter clearing project: http://lovejoyandpeas.blogspot.com/2013/03/14-minute-kitchen-counter-clutter.html
16 minute desk decluttering project: http://lovejoyandpeas.blogspot.com/2013/02/16-minute-desk-decluttering-project.html
My personal home vision post: http://lovejoyandpeas.blogspot.com/2013/02/my-home-vision-new-series-on.html
Easy exercise motivation trick: http://lovejoyandpeas.blogspot.com/2012/02/easy-exercise-motivation-trick.html
Clutter Clean in 2013 Facebook community: https://www.facebook.com/ClutterCleanIn2013
My 2013 reading goals: http://lovejoyandpeas.blogspot.com/2013/01/ten-terrific-goal-boosting-books-for.html

Monday, July 28, 2014

My Simplifying Home 8 Week Journey: Week 4, Day 7

Once again, I didn't come close to getting everything on this week's checklist finished but I did tackle some serious clutter and I feel great about that.  Earlier in the week I organized my vanity/sink area but since then I've been working on my cosmetics/toiletry cabinet.

Above is my "after" photo for my skin care shelf. It looked as bad as the "before" picture of my body care/overflow shelf (below) before I organized it. Although one thing that didn't change is my most frequently used items are at the front of the shelf, mostly in order of frequency of use (I keep the eye makeup remover on the far left even though I don't wear makeup every day). Also, opened products are in the pink basket and backups are in the blue bin behind the pink bin.
Here's the "before" photo of my body care/overflow shelf. All of the areas in today's post were at least this bad (the color cosmetics was much worse) before organizing and clutter clearing.

I try to keep posts to five photos or less so this one has one "before" and four "afters." It's nice that I have four freshly organized areas to share with you but I'm sorry I couldn't fit in all the "before" photos.
Here's that same shelf, after purging the clutter and organizing the keepers. The blue bag on the right is my "travel" bag. It has a little stand up mirror, a full face makeup palette, mini makeup brush set and tissues so if I need to put makeup on anywhere besides my bathroom all I have to do is add my current mascara and I'm good to go. The blue bag was behind the pink bottle in the "before" photo but there was so much clutter it was almost impossible to see (and I had to pull out two things to access it whereas now I can just reach in and grab it - much nicer).
This is my primer, foundation,powder, bronzer and blush shelf, organized in that order. Like the skin care shelf, open items are in the front bins and backups are in the back bin. I use the little bamboo bin for the primers and tinted moisturizer (which I suppose could go in skin care but I think of it as makeup so keep it here). The maroon box bottom is salvaged because I liked the color and it fits my most often used items while still letting them be easy to reach. It holds foundation, powder, blush and bronzer. Someday I'll replace the blue bins with pink, red or bamboo ones but they fit perfectly and this cabinet is usually shut so I'm in no hurry.
I think of this as my color cosmetics shelf but it's primarily eye and lip products. Before my organizing and clutter clearing, the shelf was precariously piled all the way to the top with a wide assortment of products and there wasn't an inch of free space behind the bamboo sorter (which was all the way to the front edge of the shelf. So even though it might not look like much to you, it was a huge relief to me. I didn't realize how much the pile bugged me until it was cleaned up.

I have my eye products to the left and my lip products to the right with the most often used items in the easiest to reach spots. I keep a little pair of scissors in there too to make opening up new products easier.

Behind the bamboo sorter there are four little clear plastic tubs. One each for mascara, eye liner, eye shadow and lip product backups. No, I don't need so many backups but the ones I kept are all products I either like or want to try.

Tomorrow we start week 5: bedrooms and closets. I don't really feel like I'm done in the bathroom yet (there are two more shelves in my cosmetics/toiletries cabinet plus the whole the linen closet) but I can always come back to it once this challenge is over and I did conquer the areas that I use the most often. I'm enjoying my newly organized spaces.

Thank you for joining me and thank you to Trina of Beginner Beans for making her Simplifying Home challenge a free resource. May God bless you and Trina too!

How do you organize your toiletries and/or cosmetics? Do you have a great clutter clearing story or organizing tip to share? I'd love to hear it!

Related posts:
Week 1, day 1: http://lovejoyandpeas.blogspot.com/2014/07/my-simplifying-home-8-week-journey-week.html
Week 2, day 7: http://lovejoyandpeas.blogspot.com/2014/07/my-simplifying-home-8-week-journey-week_14.html
Week 3, day 3: http://lovejoyandpeas.blogspot.com/2014/07/my-simplifying-home-8-week-journey-week_17.html

Week 3, day 7: http://lovejoyandpeas.blogspot.com/2014/07/my-simplifying-home-8-week-journey-week_21.html   

Week 4, day 3: http://lovejoyandpeas.blogspot.com/2014/07/my-simplifying-home-8-week-journey-week_24.html

Thursday, July 24, 2014

My Simplifying Home 8 Week Journey: Week 4, Day 3

Above is the "after" picture of my sink/vanity area. The "before" (below) wasn't so bad but I wanted to tidy it up. I tend to leave new purchases and samples out until I try them at least once but it makes for a cluttered counter.

Like usual when clutter clearing, I removed everything from the area, cleaned everything (except the makeup brushes - that's a separate project), purged the clutter, put things that belong elsewhere away and put back just what I need, use and/or love. In addition, I made a little "beautiful" sign for the bottom drawer of my cotton/q-tip container (near the top right of the photo) and a "clean" sign for my soap dispenser. I had a matching pretty marble dispenser but it didn't work well.  This plastic dispenser works well but was kind of ugly and I think the "clean" sign makes it much nicer.
This didn't take very long so I decided to do my tissue/hairbrush shelf too.
But before I get to that Baby cat wanted to make an appearance (I know I'm biased but I think she's adorable). From this angle you can see that I just attached the "clean" sign with two rubber bands. Because it's just untreated paper I wanted it to be easy to replace.
Here's the "before" of my hairbrush/tissue shelf. All the clutter made it hard to reach the tissues. Like with my vanity, I tend to leave things out until I use them. However, that weird looking pink detangler brush didn't work on my hair. I use it on my cat though (and she loves it). So I put that with the cat brushes and the rest of the project followed the same clutter clearing/organizing steps as my vanity/sink area (described above). The only difference is that I didn't make any signs and I did add a towel underneath the keepers to hide the plastic and make it easier to clean.
Here's the "after" of my hairbrush/tissue shelf. Nothing exceptional but a lot cleaner looking and it's easier to get to the things I use every day. In case you're wondering, instead of putting the hair styling kit away I put it under the tissue box to raise it up and make it easier to reach.

Both parts of this project took about 20 minutes altogether and I think it was time well spent, especially since they were my first two MITs (most important tasks) for this week's Simplifying Home Challenge. It will probably take me at least that long to clean my makeup brushes but that's my third MIT for the week (any further progress is a bonus).

Thank you for joining me and thank you to Trina of Beginner Beans for making her Simplifying Home challenge a free resource. May God bless you and Trina too!

What in your bathroom needs organizing the most? What was the most rewarding organizing or clutter clearing project you've ever done? 

Related posts:
Week 1, day 1: http://lovejoyandpeas.blogspot.com/2014/07/my-simplifying-home-8-week-journey-week.html
Week 2, day 7: http://lovejoyandpeas.blogspot.com/2014/07/my-simplifying-home-8-week-journey-week_14.html
Week 3, day 3: http://lovejoyandpeas.blogspot.com/2014/07/my-simplifying-home-8-week-journey-week_17.html

Week 3, day 7: http://lovejoyandpeas.blogspot.com/2014/07/my-simplifying-home-8-week-journey-week_21.html